Easy Brunch

Who wants sausage and eggs? “Me! Me! Me!” Sunday brunch is set…sausage, eggs, and why not add some fried potatoes in the mix? Sounds like a plan!

Besides bacon, I can’t think of a better smell than sausage patties cooking in a pan. One of my next kitchen wishes, besides a blowtorch, is a meat grinder. Yep, this former vegan wants a meat grinder. I have a Kitchen Aid, so all I need is the attachment. I am an easy girl to buy presents for; you can just woo me with kitchen appliances.

Of course, you must have cast iron skillets. If you don’t, put them on your presents list. I would get at least 2; one large and one medium. Might as well make it an entire cast iron family.
007

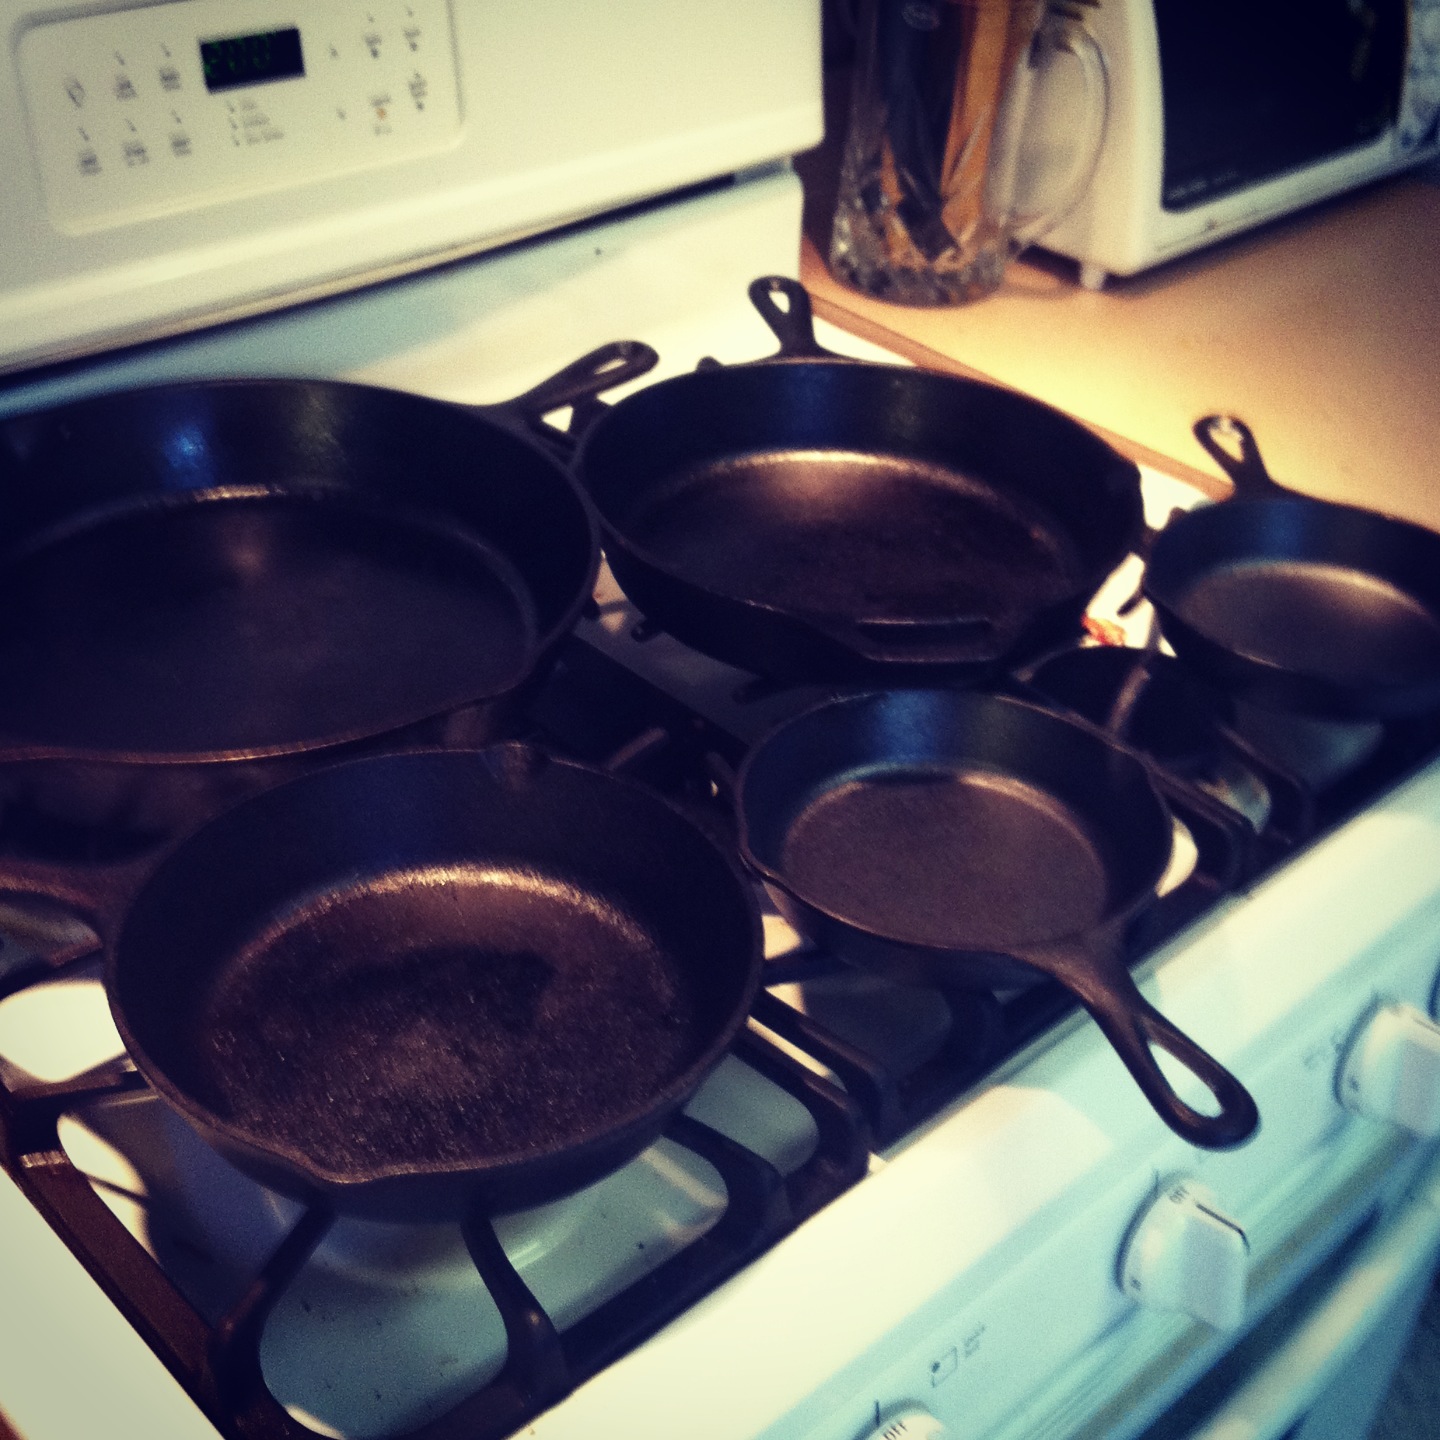
Heat a couple up for your meat and potatoes. I cut baby potatoes in fourths and fried them in vegetable oil with lots of salt and pepper. I am not a huge fan of the shredded potato hash you get out unless it is SUPER crisp. I love home fries and these small diced potatoes cut up, because they get a bit crispy on the outside, but are still soft, but never mushy.

007

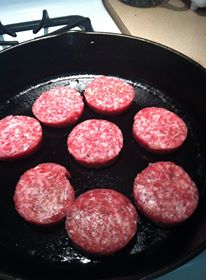
Then add your sausage patties to the pan. Since I don’t have a meat grinder YET, I just bought some Bob Evan ones from the store. Those are pretty tasty, plus they were on sale. The package says cook them for 10 minutes on the first side and flip and cook until 165 or no longer pink. I am never one for following the rules, so I cooked it for 8 minutes on the first side and 6 minutes on the other side. I cut one in half to make sure it was done. Cooked to perfection. No sausage hockey pucks here!

untitled

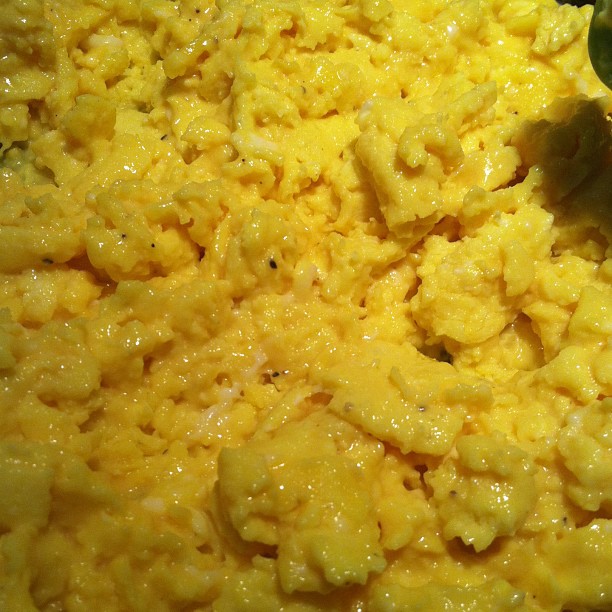
On to the eggs. Heat up your pan (non-stick is best here. Scrambled eggs are notorious for sticking to the pan no matter what you put in it.) I cracked a dozen eggs in a bowl with salt and pepper and whisked very well. Then I added it to a well buttered pan. I also add a tablespoon of cut up butter and about 2 tablespoons of heavy cream. You could use milk, half and half, or leave them out entirely. I just think they add an extra layer of flavor; a nice creaminess to the eggs and it also helps them from drying out.

Now, the best way to cook eggs or any kind are low and slow. If you cook them too fast, they end up in a hard mess. I like my eggs on the runny/ super soft side, but my husband likes them a little less soft. I make them a bit in-between. One day, I will have to do a post on different variations of eggs. We love our eggs in this household!
006

001

What is your favorite brunch meal?

Caring for your cast iron pan or skillet

It is no secret that I love my cast iron pans. There are lots of reasons to embrace cast iron. First, it is non-toxic; when you heat it up, it is not going to give off any toxic materials, like a Teflon pan. It is very versatile. You can use it on the stove or in the oven. It cooks evenly, which means the heat is distributed well, and you don’t get any “hot spots.” It is easy to season and simple to clean!

When you get a new pan, you should season it well. Basically, you add fat to it. You could use vegetable shortening (Crisco), olive or vegetable oil, or my favorite, bacon fat. Save all of the bacon grease from the pan when you make bacon and keep it in a covered can of some sort in the refrigerator). You should also add a bit of salt and rub that in the bottom and all the sides.
003

Cleaning your pan is simple…Rinse it in hot water while the pan is still hot. DO NOT USE SOAP!!!!! This strips your pan of all its flavor and seasoning and all you are left with is a soapy taste. No one wants to eat soap flavored food. If your pan has been sitting out and has some food stuck in it, just heat it back up on the stove, add a little water or oil in the pan, and it will be easy to clean with a paper towel or gentle scrub brush. Do not soak your pan in water. You want to make sure you dry your pan completely. I dry mine off in a 200 degree oven for a while. This will help prevent rust. If you do find a bit of rust, you can rinse it in hot water and re-season the pan with some fat and salt.

Storing your cast iron pan- I keep mine in the oven, on the stove, and in the cabinet doors. Do not stack them inside of each other. This may cause them to rust.

Happy cast iron pan family
007

Beef and Chicken Enchiladas

Have you ever stopped and thought about all the different foods we call, “Mexican Food?” It seems everything is kinda the same just wrapped in a corn or flour tortilla in some way or another. Quesadilla, taco, burrito, enchilada, taqito, etc. No matter the preparation, you can transform it into any yummy dish using the right seasonings and cooking methods. It is one of my favorite cuisines. Maybe because I love guacamole, sour cream, queso, chips, and margaritas.

I used to hate enchiladas. I never understood why anyone just didn’t get a burrito and call it a day. It turns out corn tortillas have been the culprit all the time. I just couldn’t get past the consistency of a corn tortilla. I like crunchy. I like soft. I just do not like that in-between consistency.

I have found a few ways to get past this. 1. Fry the corn tortillas in oil for 5-10 seconds on each side. A bit messy and not very healthy. 2. Place the tortillas in a paper towel and put them in the microwave for 15 seconds. This is healthy and practical. It gets the tortillas pliable to load up with your ingredients and not break. Plus, it makes them a bit softer in the oven. 3. You could also just use flour tortillas. Not authentic, but doable if you already have these in your fridge.

For the filling…chicken, beef, shrimp, veggies, bean; there are many choices. Tonight I made chicken and beef. I always like to make a double batch of enchiladas, because they freeze beautifully. Nothing better than coming home on a week night, too tired to cook, and then remember you have these sweet gems in the freezer!

006

Chicken Filling- There are many different ways to make your chicken, but this is how I decided to do it tonight. I boiled the chicken in chicken stock (I had homemade stock in the freezer.) You could use box or can in you have it; you could use water; or you could use a combo of both. Season your chicken well, even at this point. I used salt, pepper, a bit of poultry seasoning, ground cumin, and some adobo all spice (in the ethnic section of your grocery store). Boil on med. heat until tender and cooked through. I used 2 boneless skinless chicken breasts cut in half and cooked it for about 18 minutes. Cool. Shred. Then I added a bit of enchilada sauce, and a sprinkle of all the above seasonings, along with garlic and onion powder. Add half a can of green chilies. Mix together.

007

Beef Filling- Again, many different variations, but this is how I made mine. Cut and chop 1 onion and 2 garlic cloves. Start to brown in a med. pan for a bit. Then add your ground beef. Add a couple of tablespoons of Worcestershire. I am in love with the combo of beef and Worcestershire. However you pronounce it, it brings out an extra layer of flavor to the beef. I also added 2 sprinkles of crushed red peppers for a bit of a kick. LOVE! Lastly, add most of the same seasonings as the chicken; Adobo seasoning, ground cumin, salt, pepper.

008

I sprayed my 2 pans with Pam and put some enchilada sauce on the bottom of each. Once all the meat is cooled, add to the tortillas with some mixed Mexican cheese. Fold and place seam side down in your pan. Cover with enchilada sauce, more Mexican cheese, and some crumbled queso fresco (crumbly Mexican cheese) on top. I used 2 different enchilada sauces. One was from Old El Paso (on chicken) and one was a roasted tomato from Rick Bayless (on beef) I wanted to try out. Don’t be afraid to experiment!

009

I cooked it about 25 minutes (cooked through and cheese melted on top) on 350.

011

Creamy sun-dried tomato spread

Most mornings I wake up just wanting coffee. Then by late morning, I start to get pretty hungry. I want a little snack or light lunch, and I want to make something easy, yet healthy. So this morning I was taking stock of what I needed to buy at the store later and found an unopened bottle of sun-dried tomatoes in the back of the fridge. I immediately opened them up and had one. I love the tart chewy taste of these little beauties. They are so versatile; you can chop them up and throw them in a salad, on top of a pizza, in a sandwich, or make them in to a spread. I decided to make a spread. All you need is a food processer and these…

001

003

You can make a batch of this and keep it in the fridge for future snacking. It would be a great dip for pita, bagel, or tortilla chips. You could spread it on a sandwich instead of mayo or mustard. It would be lovely on little toasted baguettes, like a tapenade. It would even be great for entertaining or bringing to parties. I spread mine on a piece of wheat toast for a healthy snack!

005

Do you have any easy snack ideas?

Greek is the word

The last 2 days, I have had Greek food on my mind. Yesterday, my family and I went to a Mediterranean Persian place called OPA, which is always very yummy. I usually get some sort of falafel dish. I had a falafel wrap and it was delish. It was covered in hummus, lettuce, and tomato. I didn’t take a picture of it for a few reasons. It was wrapped up so tight in its paper, and if I unwrapped it to take a picture, it probably would have fallen apart. Also, I still kind of feel weird about taking pictures of my food in a restaurant. I guess I will just have to get over that. Plus, sometimes I just want to eat my food already! I really want to learn how to make falafel, so I am going to have to research and test recipes.

Lunch today was my Greekish salad.

002

The usual suspects; lettuce, cucumbers, tomatoes, olives, and feta. Also some random things like broccoli, cranberries, croutons, and sesame seeds. The good thing about making your own salad is you can just customize it anyway you like!

Hope you guys have are having a great holiday! Be safe out there and eat lots of yummy food tonight!